
Simple Controls of iOS Application Development

Hello fellas, Here, we discuss something about designing iOS Application development. Some basic controls which helps you to start your basic application development. I am here to discuss basic controls with Swift Environment. But, designing is not depends on programming language. So, don't worry about Swift or Objective-C.
For this blog we want to create one project for iOS Application Development. If you don't know about how to create xcode project then follow below blog:
Create Xcode Project - iOS Editor
Now, Open project & go to Main.storyboard & it's looks like:
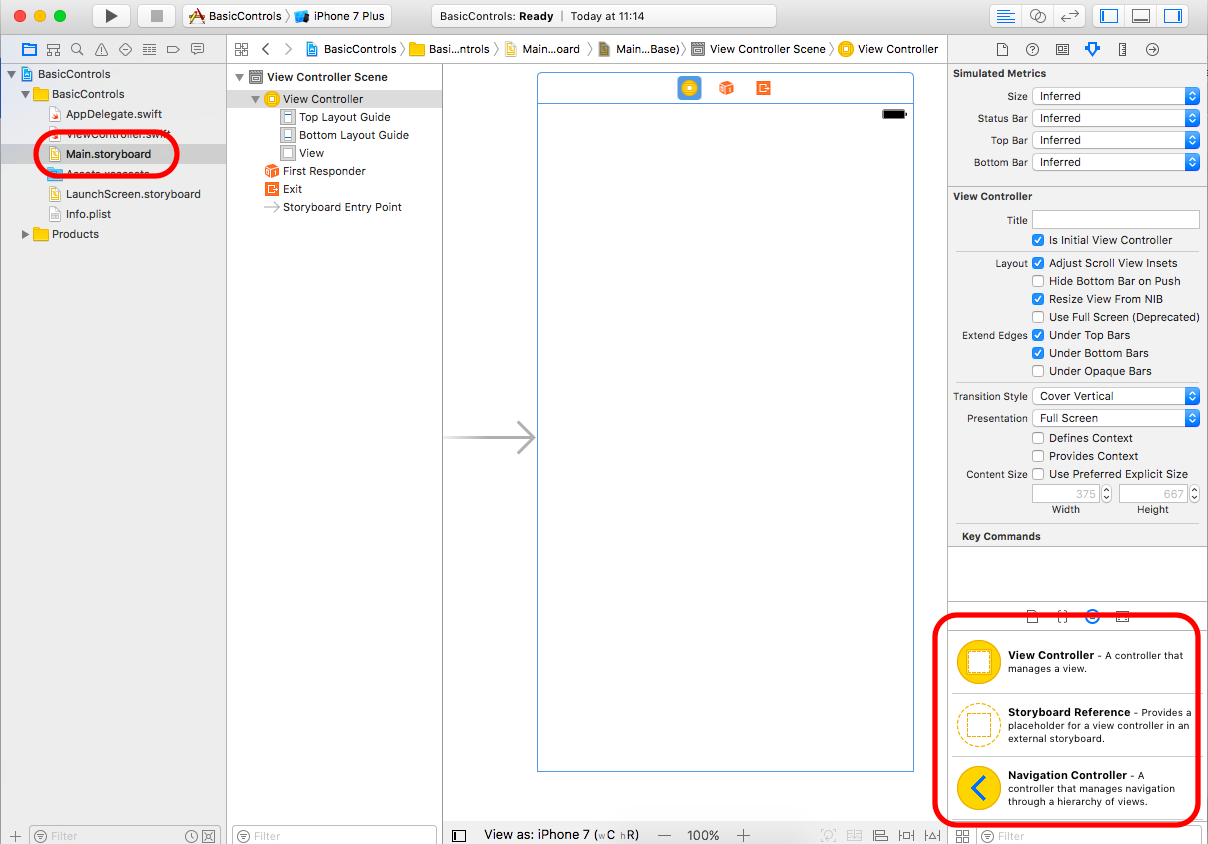
Here, check above screen: Right side panel (Navigation panel) after clicking on Main.storyboard open screen (design mode) in Xcode Editor. We use left side panel (left bottom part) for drag & drop control to center screen.
Now, we put some basic controls & link up with swift programming file. Check below points:
1. UILabel :-
Drag & drop UILabel form right bottom part to center iOS screen. Check out below video:
As per above video, You can easily search any control by typing below section. I typed UILabel and drag & drop control to screen. (We do this for all controls for designing iOS application).
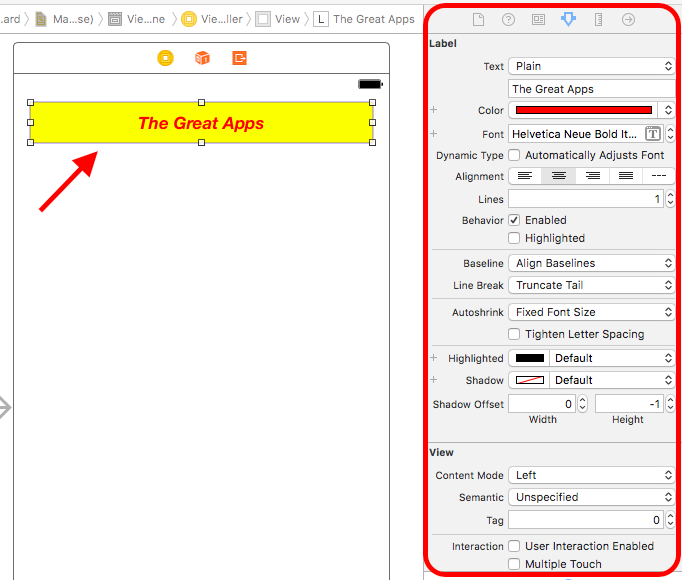
All property related to any controls are on right side panel. Check below screen with some editing in UILabel & its property window.
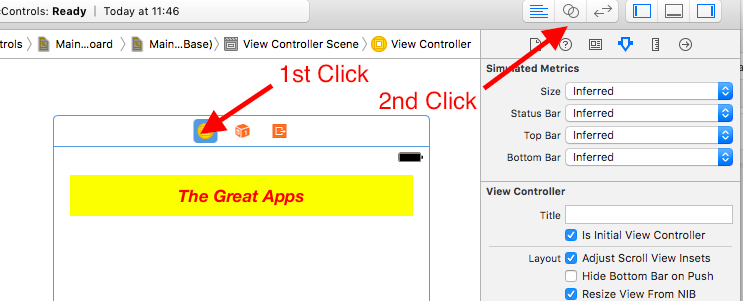
Now, we connected this UILabel to coding file with name default is here ViewController.swift. For these, click on View Controller (yellow part) on Main.storyboard & then split view for show coding part. Check below image:
Now, we create reference of this UILabel control to ViewController.swift file. Check below video for it. (We do same for all other controls):
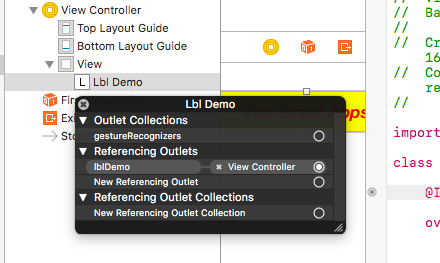
On this video, i am selecting UILabel control & press Ctrl Key and drag & drop to the coding view. After that popping dialogue for name, I gave lblDemo name & create reference of that control. Now, i am accesing label with name lblDemo. There is also 2nd way to do this. Select UILabel control & Right click which popup below dialogue and create Outlet for UILabel, You must choose Referencing Outlets on that dialogue and drag & drop to the coding file.
Reference Outlet for UIButton like:
@IBOutlet weak var lblDemo: UILabel!
Now, that's it! You design part of almost every control are done. I give demo code for accessing UILabel in viewDidLoad method:
    	override func viewDidLoad()
    {
        super.viewDidLoad()
        // Do any additional setup after loading the view, typically from a nib.

        lblDemo.text = "Your Run time Text Here"
    }
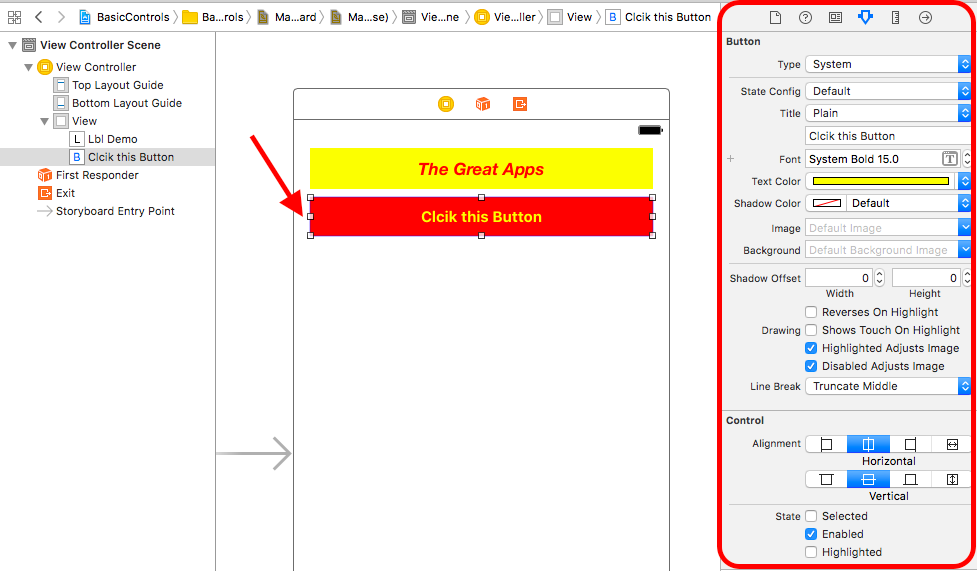
2. UIButton :-
For UIButton, Follow above process & check below screen:
Reference Outlet for UIButton like:
@IBOutlet weak var btnDemo: UIButton!
You can create click event of this UIButton by drag & drop to coding part & choose connection type Action from dialogue & give name btnDemoTapped for identify click event. Check below screen:
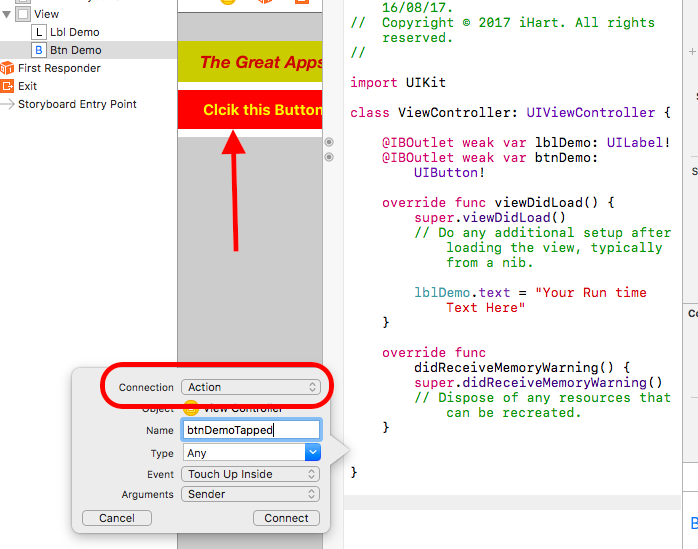
Click event of UIButton looks like:
    	@IBAction func btnDemoTapped(_ sender: Any)
{
}
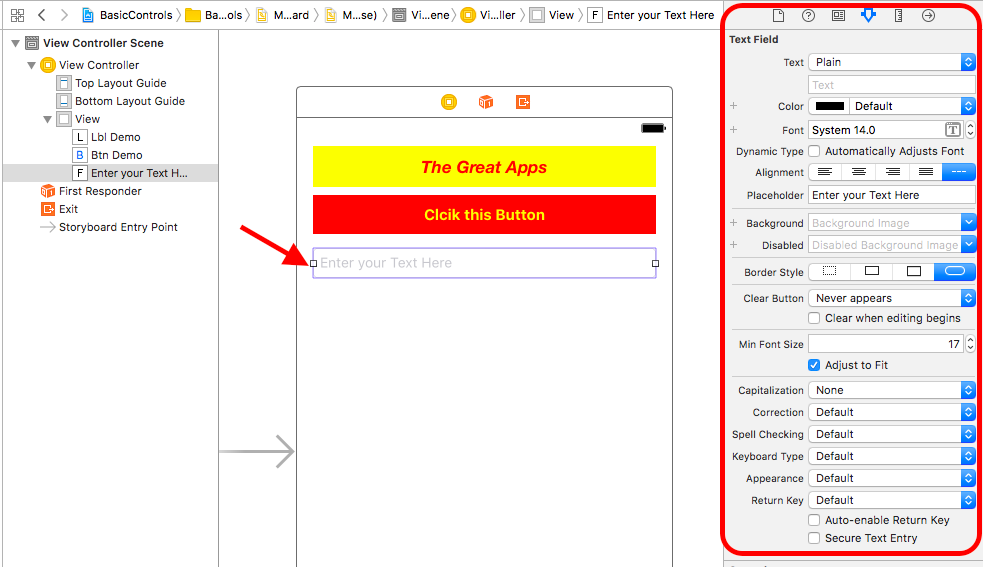
3. UITextField :-
For UITextField, Follow above process & check below screen:
Reference Outlet for UITextField like:
@IBOutlet weak var txtDemo: UITextField!
I give demo code for accessing UITextField in viewDidLoad method:
    	override func viewDidLoad()
    {
        super.viewDidLoad()
        // Do any additional setup after loading the view, typically from a nib.

        txtDemo.text = "Your Run time Text Here"
    }
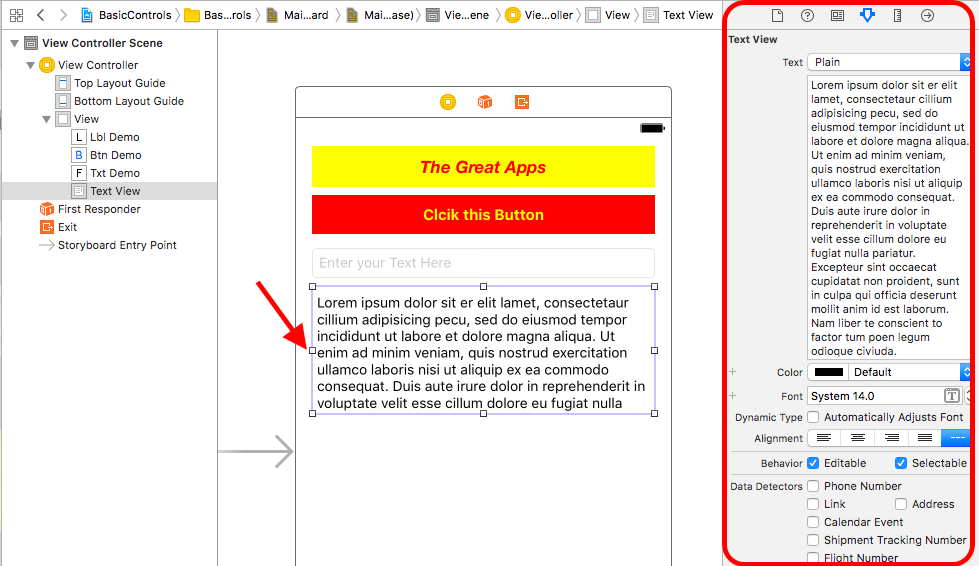
4. UITextView :-
For UITextView, Follow above process & check below screen:
Reference Outlet for UITextView like:
@IBOutlet weak var tvDemo: UITextView!
I give demo code for accessing UITextField in viewDidLoad method:
    	override func viewDidLoad()
    {
        super.viewDidLoad()
        // Do any additional setup after loading the view, typically from a nib.

        tvDemo.text = "Your Run time Text Here"
    }
5. UISegmentedControl :-
For UISegmentedControl, Follow above process & check below screen:
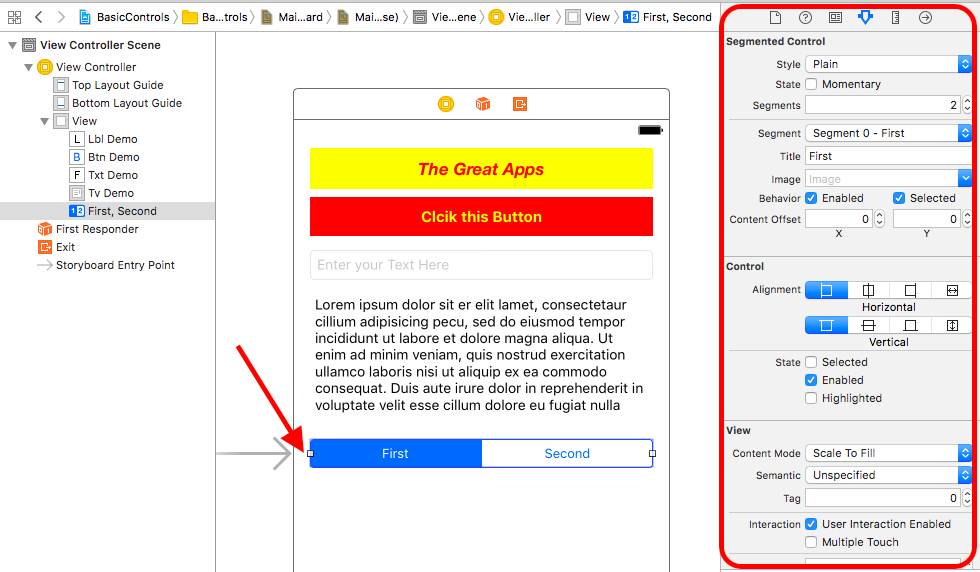
Reference Outlet for UISegmentedControl like:
@IBOutlet weak var segmentDemo: UISegmentedControl!
I give demo code for accessing UISegmentedControl by it's value Changed method & connection Action (Same like generate click event on UIButton):
    	@IBAction func handleSegmentChange(_ sender: Any)
    {
        if (sender as! UISegmentedControl).selectedSegmentIndex == 0 {

            print("Select First segment")
        } else if (sender as! UISegmentedControl).selectedSegmentIndex == 2 {

            print("Select Second segment")
        }
    }
That's it! All basic controls has this methods & all controls are accessible with it's IBOutlet. Some of controls like UISlider, UISwitch, UIStepper etc check yourself. If you have any query regarding this controls or any other basic controls, Feel free to contact us.
That’s it! You can easily download demo code by clicking here.
About The Author

Related Blog
View All-
Simple UITableView Controller ? Swift
In iOS Application, If you want to display multiple data like row wise means List format than you must be use UITableViewController which is provided with Basic iOS UI Controls. UITableViewController, UITableView, UITableViewCell : These 3 are mainly used for ...
-
5 Best IOS Testing Frameworks That Work Excellently
The IOS versions keep on updating year after year with Apple Incorporations taking care of the demands of the users. According to reports by Statista, the latest IOS 11 version is running on nearly 81% of the Apple devices until May 2018. To maintain the quality ...


