
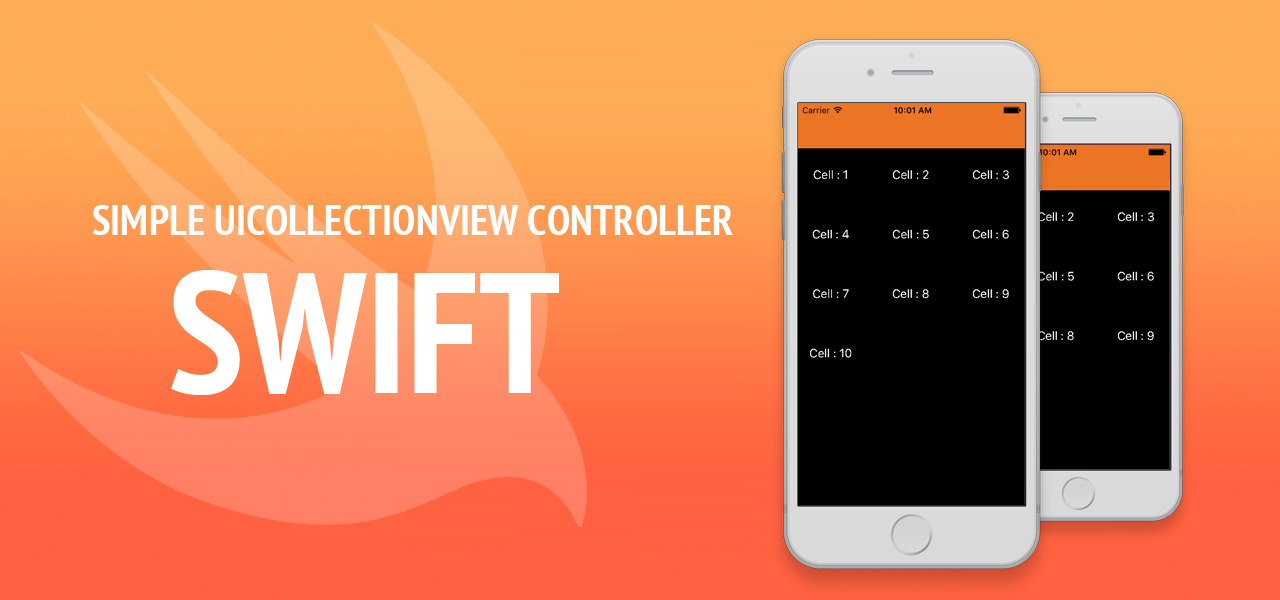
Simple UICollectionView Controller - Swift
In iOS Application, If you want to display multiple data like cell wise means collection format than you must be use UICollectionViewController which is provided with Basic iOS UI Controls.
UICollectionViewController, UICollectionView, UICollectionViewCell : These 3 are mainly used for display any Collection data in iOS Application.
Now, We implement UICollectionViewController (Gallery type View) in iOS Application using Swift language. Follow below steps for Simple UICollectionView using Swift.
Step – 1: Create Xcode Project
First of all create Xcode project, which support Swift-programming language. If you have no idea about it please refer our blog:
Create Xcode Project – iOS Editor
Step – 2: Create UI for Simple UICollectionView
Now, create UI for this demo, Open Main.storyboard file & make design as per given below screen:
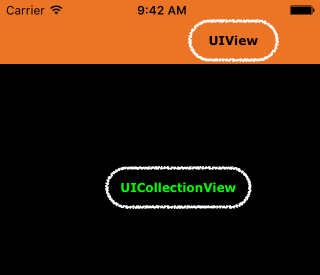
As per above screen, clearly shows that Top Bar is made with UIView & other part cover with UICollectionView.
Step – 3: UICollectionView Delegate & DataSource link
Now, Click on UICollectionView component on Main.storyboard (or left sidebar click Collection View) and make Right Click on it & give link to the View Controller as per display in below screenshot:
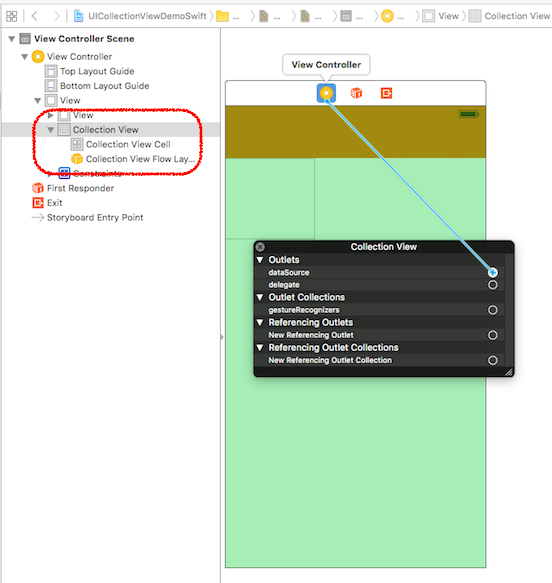
Here, Right click give you two option 1st datasource & 2nd delegate. Make connection with View Controller. This is very important thing to display data in UICollectionView.
Step – 4: UICollectionViewCell Identifier set
Now, click on Collection View Cell (left sidebar) or direct click on UICollectionViewCell, which you put on UICollectionView. Now, Right sidebar have some option where 2nd option is Identifier. Set it with any value. This looks like:
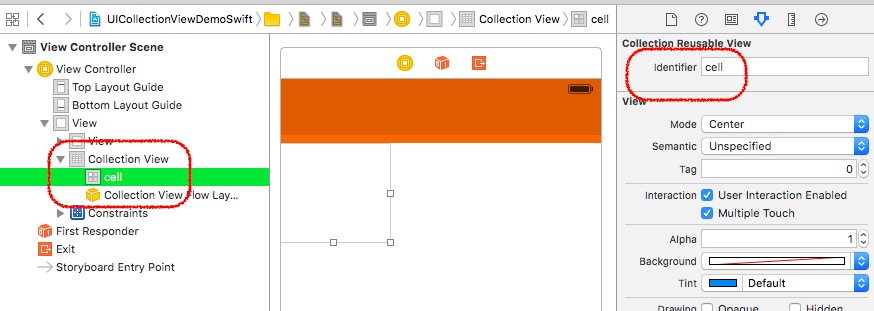
Here, we set identifier “cell”. We use this identifier in further process for displaying data in UICollectionViewCell.
Step – 5: UICollectionView Code
Now, we implement code for UICollectionView display data in list format. For that in project navigation sidebar (left side) you have one file ViewController.swift file.
Now, open ViewController.swift file & implement UICollectionView Delegate & DataSource line, which looks like:
import UIKit

class ViewController: UIViewController, UICollectionViewDelegate, UICollectionViewDataSource
{

}
Step – 6: UICollectionView Delegate & DataSource Method
Now, UICollectionView have some Delegate & DataSource method, which help us display list data in iOS Application.
(i) numberOfSectionsInCollectionView method: this method used for set number of section in Collection View. Currently we set here only 1 section & it’s code block looks like:
func numberOfSectionsInCollectionView(collectionView: UICollectionView) -> Int
    {
        return 1
    }
(ii) numberOfItemsInSection method: Each section has number of item. This method returns that number of item in our 1 section & it’s code block looks like:
func collectionView(collectionView: UICollectionView, numberOfItemsInSection section: Int) -> Int
    {
        return 10
    }
(iiI) cellForItemAtIndexPath method: This method is used for create cell for each item which is display in list format & it’s code block looks like:
func collectionView(collectionView: UICollectionView, cellForItemAtIndexPath indexPath: NSIndexPath) -> UICollectionViewCell
    {
        let cell: UICollectionViewCell = collectionView.dequeueReusableCellWithReuseIdentifier("cell", forIndexPath: indexPath)

        let lbl: UILabel = UILabel(frame: cell.contentView.frame)
        lbl.textColor = UIColor.whiteColor()
        lbl.textAlignment = .Center
        lbl.text = "Cell : \(indexPath.row + 1)"

        cell.addSubview(lbl)

        return cell
    }
Here, identifier “cell” is used with dequeueReusableCellWithReuseIdentifier for create new item & re used it when it disappear form screen. And we create on UILabel programmatically, set some property of UILabel & set text is Cell : (row number) format.
Step – 7: Final Output
Now, Build (Cmd + b) & Run (Cmd + r) your iOS Project & your final output looks like:
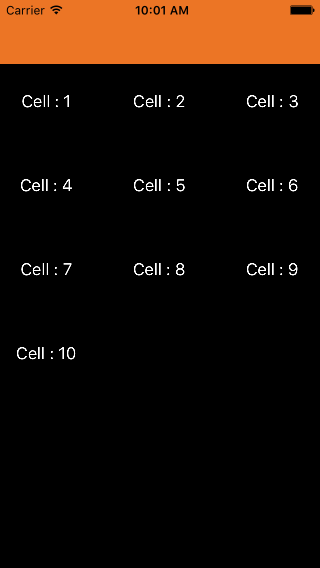
We can also handle tap on each item on UICollectionView. We use didSelectItemAtIndexPath method for it & it’s code block looks like:
func collectionView(collectionView: UICollectionView, didSelectItemAtIndexPath indexPath: NSIndexPath)
    {
        let alert: UIAlertController = UIAlertController(title: "Cell Tap", message: "Cell : \(indexPath.row + 1) selected", preferredStyle: .Alert)

        let okAction: UIAlertAction = UIAlertAction(title: "Okay", style: .Default, handler: nil)
        alert.addAction(okAction)

        self.presentViewController(alert, animated: true, completion: nil)
    }
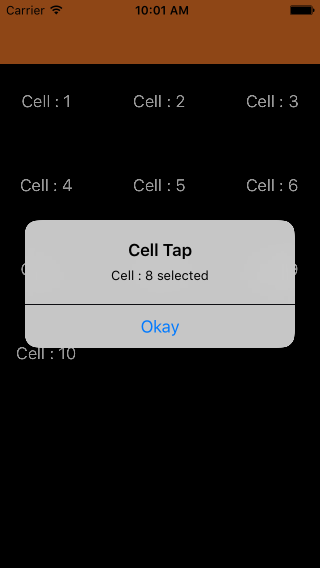
Here, we display alert message for each tap on UICollectionViewCell. If you tap on “Cell : 8” than it’s display alert like:
That’s it! You can easily download demo code by clicking here.
"Hey, I am iHart, iOS Application Developer. If you have any query or any suggestion please comment it!"
About The Author

Related Blog
View All-

Future of IOS App Development- Five Years down the Line!
Venturing into your first mobile app development project can be a frustrating proposition especially if you fail to give proper attention in selecting an operating system- And it's one that can have long-lasting ramifications. Looking at the current mobile ...
-

5 iPhone app development trends to watch out in 2019
Apple powers its smartphones with iOS, one of the most advanced mobile operating systems available in the market. With Apple’s mobile hardware becoming more sophisticated, the technology of iPhone development also continues to evolve. The company launched ...


