
Simple UITableView Controller ? Swift
In iOS Application, If you want to display multiple data like row wise means List format than you must be use UITableViewController which is provided with Basic iOS UI Controls.
UITableViewController, UITableView, UITableViewCell : These 3 are mainly used for display any List data in iOS Application.
Now, We implement UITableViewController (List type View) in iOS Application using Swift language. Follow below steps for Simple UITableView using Swift.
Step – 1: Create Xcode Project
First of all create Xcode project, which support Swift programming language. If you have no idea about it please refer our blog: Create Xcode Project – iOS Editor
Step – 2: Create UI for Simple UITableView
Now, create UI for this demo, Open Main.storyboard file & make design as per given below screen:
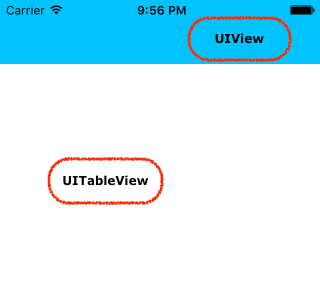
As per above screen, clearly shows that Top Bar is made with UIView & other part cover with UITableView.
Step – 3: UITableView Delegate & DataSource link
Now, Click on UITableView component on Main.storyboard (or left sidebar click Table View) and make Right Click on it & give link to the View Controller as per display in below screenshot:
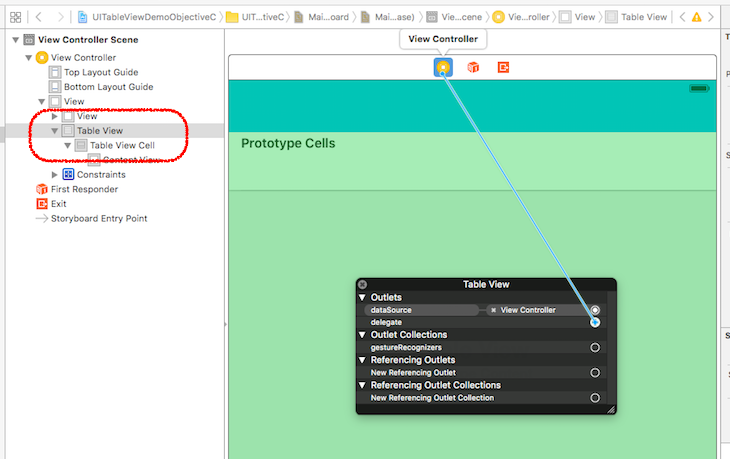
Here, Right click give you two option 1st datasource & 2nd delegate. Make connection with View Controller. This is very important thing to display data in UITableView.
Step – 4: UITableViewCell Identifier set
Now, click on Table View Cell (left sidebar) or direct click on UITableViewCell, which you put on UITableView. Now, Right sidebar have some option where 2nd option is Identifier. Set it with any value. This looks like:
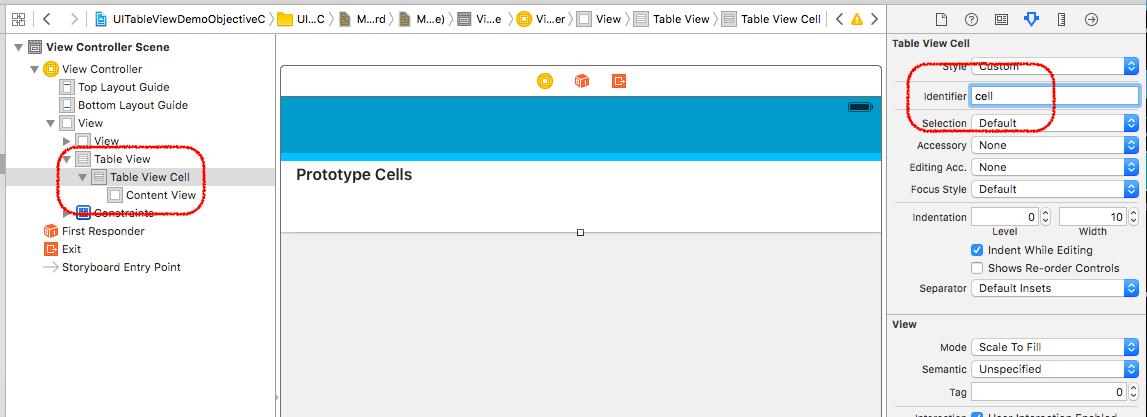
Here, we set identifier “cell”. We use this identifier in further process for displaying data in UITableViewCell.
Step – 5: UITableView Code
Now, we implement code for UITableView display data in list format. For that in project navigation sidebar (left side) you have one file ViewController.swift file.
Now, open ViewController.swift file & implement UITableView Delegate & DataSource line, which looks like:
import UIKit

class ViewController: UIViewController, UITableViewDelegate, UITableViewDataSource
{

}
Step – 6: UITableView Delegate & DataSource Method
Now, UITableView have some Delegate & DataSource method, which help us display list data in iOS Application.
(i) numberOfSectionsInTableView method: this method used for set number of section in Table View. Currently we set here only 1 section & it’s code block looks like:
func numberOfSectionsInTableView(tableView: UITableView) -> Int
    {
        return 1
    }
(ii) numberOfRowsInSection method: Each section has number of row. This method returns that number of row in our 1 section & it’s code block looks like:
func tableView(tableView: UITableView, numberOfRowsInSection section: Int) -> Int
    {
        return 10
    }
(iiI) cellForRowAtIndexPath method: This method is used for create cell for each row which is display in list format & it’s code block looks like:
func tableView(tableView: UITableView, cellForRowAtIndexPath indexPath: NSIndexPath) -> UITableViewCell
    {
        let cell: UITableViewCell = tableView.dequeueReusableCellWithIdentifier("cell")!

        cell.textLabel?.text = "Row : \(indexPath.row + 1)"

        return cell
    }
Here, identifier “cell” is used with dequeueReusableCellWithIdentifier for create new row & re used it when it disappear form screen. And we set textLabel.text is Row : (row number) format.
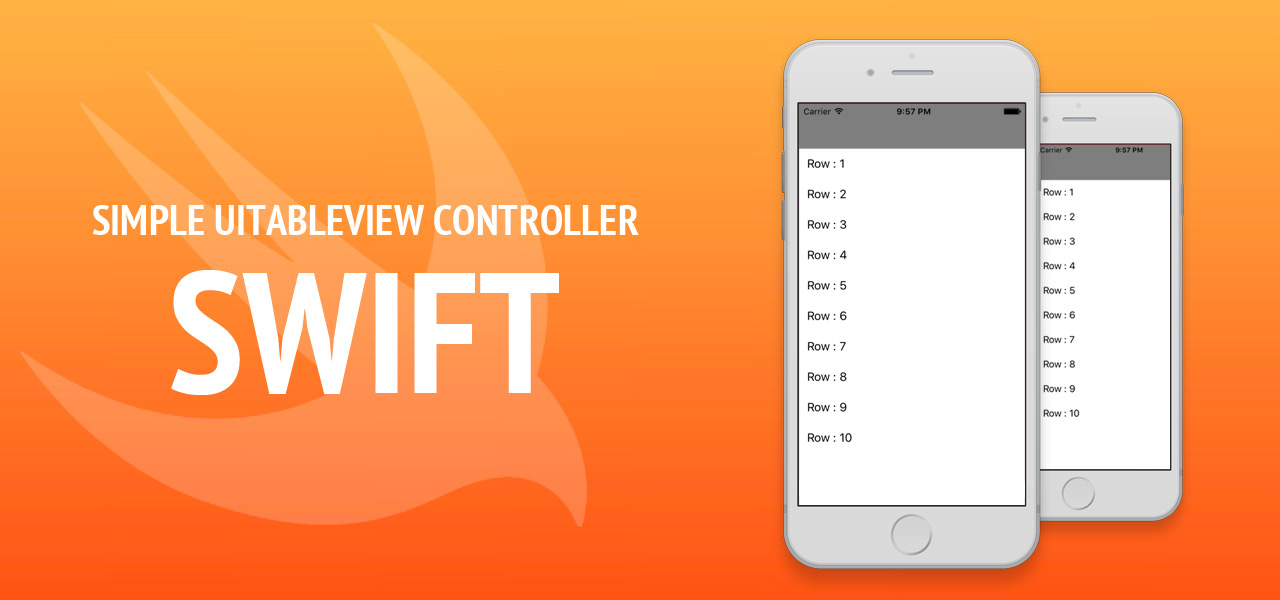
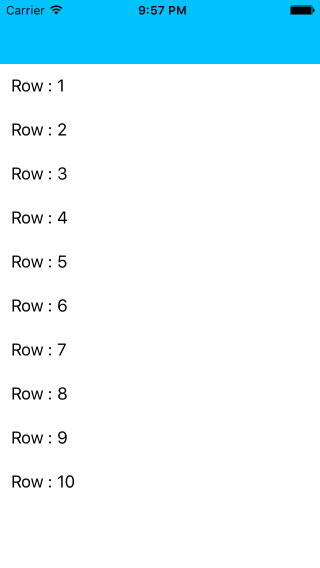
Step – 7: Final Output
Now, Build (Cmd + b) & Run (Cmd + r) your iOS Project & your final output looks like:
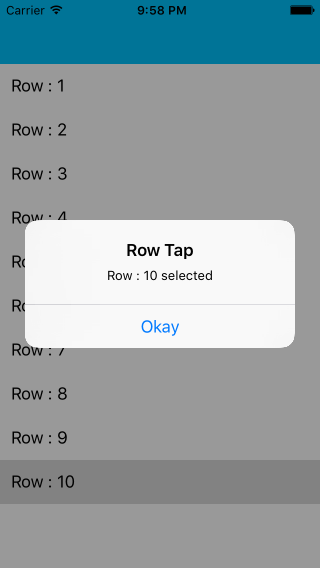
We can also handle tap on each row on UITableView. We use didSelectRowAtIndexPath method for it & it’s code block looks like:
func tableView(tableView: UITableView, didSelectRowAtIndexPath indexPath: NSIndexPath)
    {
        let alert: UIAlertController = UIAlertController(title: "Row Tap", message: "Row : \(indexPath.row + 1) selected", preferredStyle: .Alert)

        let okAction: UIAlertAction = UIAlertAction(title: "Okay", style: .Default, handler: nil)
        alert.addAction(okAction)

        self.presentViewController(alert, animated: true, completion: nil)
    }
Here, we display alert message for each tap on UITableViewCell. If you tap on “Row : 10” than it’s display alert like:
That’s it! You can easily download demo code by clicking here.
"Hey, I am iHart, iOS Application Developer. If you have any query or any suggestion please comment it!"
About The Author

Related Blog
View All-

What Does the iOS 14 Leak Tells us and What can we Expect
When it’s time for Apple to launch the next OS, analysts and Apple enthusiasts keep a close ear to all the rumours floating around. Many websites and tech analysts try to obtain as much information as they can, be it from official or unofficial sources. 9to5Mac ...
-

All About The Latest iOS 13 And It's New Features
The iOS 13 update is something that people are waiting for in 2019. It's an agreed fact that Apple's hardware is second to none but to make it exceptional every time iOS needs to step up. iOS 13 is not much a radical departure from iOS12 but it has updated ...


